Saturday, 29 December 2018

Reveal for the Art Elements themed challenge of 'white'.

At the beginning of December Claire from the Art Elements team announced that the themed challenge would be 'white'.  To read that blog post click HERE

To me white is not a colour, maybe that is the 'colourist' or 'artist' in me but I have always understood white to be a 'non colour' like black because it isn't present on the spectrum and can only be mixed by the eye mixing light wavelengths - I do love the theory of colour but that is not the topic for this blog challenge.

wooden painted pebble, white acrylic ink

   I love colour.  Big, bold, vibrant colour.  I love contrasting colours or clashing colours.  I love black too because it is slimming! but white in our house and in my life is a no no....I have dogs and cats!  whether that alone makes me avoid white I don't know but because I rarely use it in my art I decided rather than use 'white' for creating I would not use colour.   


I concentrated my doodle sessions with just the white of the paper, but I couldn't avoid using black fine liner pens to define for me the white areas.  I did try using just a pencil but for me the contrast wasn't enough.  So really my challenge is more 'monochrome than white'. 


I started doodling 'dolls'.  I had this idea in my head that I could create a doll like figure in just white.  I did think I would use fabric for this but then decided I wanted to use paper.  Just white paper.  The 'doll' above was originally going to be cut out and have some other outfits to clothe her like the dolls from my childhood that you used to get in magazines - the more I read about paper dolls the more fascinated I have become with them and their history is as old as mankind itself, well maybe not mankind exactly but certainly since paper has been used by scribes.


This little chap and the mouse below were just doodles in my sketchbook.  I did enjoy creating 'just white' doodles although I will admit to be itching to colour them in!


Which brings me to my 'finished' piece.. well actually it isn't finished because I wanted to create more of a world for her but life and Christmas got in the way....


My little fairy mouse, Esme,  from an Art Elements previous challenge  
 has grown on me and I doodle her quite often.  I have got rather attached to Esme as a character, so I decided to create her as an articulated paper doll.  The photo above is the original sketch working out where the pins would go and then separating the 'pieces' to cut out.  Both papers are white and fascinate me that 'white' comes in many 'colours'.


I didn't have any white split pins so I decided to use beads and thread which works really well.  I did attempt to create a tiny articulated doll with beads as the movable parts... it was fiddly!!  


Below is a project I started and probably won't finish because it just didn't hold my attention.  The idea was that I would gather together all sorts of bits of 'white' materials.  So the base is a white felt over laid with white linen.   White ribbon was attached and I glued on a white glass cabochon I fused way back when and I wanted to include paper as a material so I cut out a doodle I had of a dogs head and stitched it on with white embroidery thread.  The idea was to surround the glass cab with white beads and embellishments but I became disillusioned with the lack of colour although all the white materials intrigued me with their different hues and tones.


Below is all the guests and Art Elements team members that have taken part in this challenge, I will be very curious to see what everyone has created.  
Guest Artists

Art Elements Team

Thursday, 29 November 2018

Art Elements Star Challenge Reveal

We come to the end of November and the reveal for the Art Elements Challenge of the month.  This month the challenge was set and hosted by me and I chose 'Star'.  I thought it was quite fitting for this time of year, the long nights and starry skies, which promise the following day will be bright but frosty, creating yet more sparkle as I walk through the fields when I walk my dogs.  (You can read the original blog post HERE).

The same fields I found this rather nice flat stone and painted it with acrylic and some lovely shimmery paints, I hope you can see the shine. 


For the best part of this month it has been an endless cycle of 'if it can go wrong it did' and 'when did we get this busy because I need a holiday'... hence the confusion when I was sending out the links to those that have taken part in the challenge this month - thank you all for putting up with my endless emails for corrections!  and for most of the month I did think that this stone was going to be my rather disappointing entry to the challenge BUT... in between the chaos that has been November in this house I have 'rescued' my daughters sewing machine and been teaching myself to use it.  Until this month I have struggled all my life to even sew a button on - I did write about my sewing adventure for Art Elements and you can read that  HERE.


As I say in the AE blog post, following patterns is not something I am good at - or following a recipe for that matter - so with my new found enthusiasm for all things needle and thread, I drew an outline of a doodle I did in a sketchbook some years ago of a MerCat... and yes they really do exist ;)  


In the box of scrap material left over from my daughter's Textile exam when she was at High School (6/7 years ago!) I found some heavy-ish linen material and using a combination of Inktense pencils and blocks and acrylic paint I transformed the plain fabric into my illustrative doodle.  I have to say that for any future projects (because they are already being done I have the sewing bug!) I will be sticking to Inktense as I am not so keen on the stiffness of the fabric once acrylic is applied.  I have ordered some wax to see if I can soften it but only another experiment will tell if I like it.....


I wanted to add so much more embellishments to my MerCat but time has unfortunately got away from me and I had to stop.


On her tail is a little silver charm of an anchor because I was thinking about all the boats that MerCat has seen, those sunk beneath the waves hiding their treasure for ever.... I am an avid watcher of the History Challenge and stories of the deep ;)  


Her crown is made with silver and gold coloured wire and I added a small sea horse charm.


My star is a star fish in beautiful gold raw silk, which I left the edges to fray.  I have this sample of raw silk material in the box that I have moved from house to house, county to county, one end of the country to another.  For someone that doesn't sew that box holds some treasures.  This piece of silk was given to me by my friend as the remnent from the trousers and cummerbund my son wore as her page boy at her (first!) wedding - my daughter was the little bridesmaid in a beautiful white silk dress.  It was a very glamorous wedding and my children were the only ones that were allowed to attend, they were about 4 and 6 at the time.  The whole time I was stitching this star fish I was thinking about that wedding, the dresses of the guests, many from the other side of the world, the guests that is, most were London Couture outfits and I had a friend at the time - who could sew a button on - help me make my wedding outfit as I couldn't afford a dress from Harrods!  .. my friend did do most of the sewing.. ok all the sewing I made the tea!  I remembered my daughter getting chocolate sauce down her dress, which to this day is still stained, and my son looking like a wooden soldier as he concentrated so hard to be the perfect page boy for my friend.  I remembered the room in the big posh country manor house hotel in Kent (where we lived once.. in Kent that is not the posh hotel!).  We had a four poster bed and the bathroom was fitted with an antique claw foot bath and Victorian fire place and tiles.. it was so grand.... 

But I digress....  

I really loved creating my Mercat, finding a new muse with the artist style doll.  I loved sitting and stitching on the sequins and the beads but most of all I loved thinking of the stories the bits of fabric held, even that ribbon was saved from a cake long ago.. not one I cooked I hasten to add!  

I hope you like my Mercat and you enjoy hopping around the challenge blogs to see what everyone else has made.

Guest Artists
Cat 
Art Elements Team


Tuesday, 30 October 2018

Art Elements October Theme Challenge Reveal - Petroglyphs.

This month's Art Element Theme Challenge was set by Karen from the team and it was Petroglyphs.  You can see the original post here  

I have to admit I didn't know the word or that it has any history to it but I have been drawing on rocks and just about everything for as far back as I can remember - and that includes walls, I used to do murals in my kids rooms and the bathroom.. the en suite... I might have done the downstairs looe in one house too... but I just love to draw, doodle, illustrate.

The oldest stone I have ever done that I still have, is from 2006 and I use it to stop my kitchen door from bashing into my fridge as the handle of the door just connects nicely with the corner of the fridge.  I remember painting it, one summer holiday day, the kids were off school and the sun was beating down, it was 'almost' too hot to be outside so I was sat at the table in the kitchen painting a big old stone we had unearthed from the garden.  


I love watercolour paint these days, after many years of hating them they are now my go to for any doodling I do but before watercolour paint my instrument of choice was the coloured pencil.  The stone below of the orange cat is Inktense pencils, activated with water to make it smooth and many many layers later.......

A coat of spray varnish and this cat sits on my hearth, the only one in the family to not put hairs on the furniture!   I have a few more on my hearth in the living room too but this one is my favourite.

When Karen announced this challenge I started looking around for stones to paint.  This time of year the farmers are harvesting and plowing the fields ready for winter plantings so lots of lovely stones come to the surface of the mud but filling your pockets on a dog walk with stones a) makes people look at you funny and b) makes you walk oddly.  I fancied sourcing some wooden pebbles that I had seen others paint on via Pinterest.  


I found some!!  I ordered 6 approx 2 inch ones, the shapes do vary and slightly bigger one of approx 3 x 2 inches.  They are lovely wooden pebbles and for a while after they arrived I didn't want to spoil them. 


I tried Inktense blocks as watercolour paint on the wooden pebble at first and I hated it so I washed it off - I was a little surprised that when the Inktense had dried it wasn't stable, it did leave a small stain but I just turned it over...  

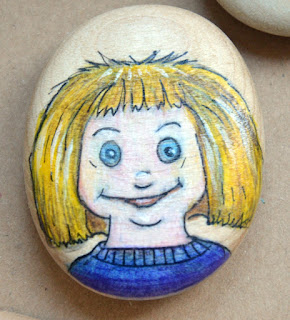
Some of my problem in drawing on the wooden pebble was me.  This last month, blame the weather, things going on at home, life in general and my creative muse was just not forth coming and when that happens I revert back to being very picky about everything I do and whereas I favour a looser illustrative style I tend to work very photo realistic when I am stressed.  I used to work photo realistic in coloured pencil in the very beginning, that is how I learn't to use the pencils with the many many layers but now that annoys me, I like colour and fun and illustrative not formal.  Thankfully I picked up the pencils and as I had 'ruined' one side of this pebble I just set about having fun and my muse didn't disappoint me.  I rather like my little girl pebble. 


I do paint on just about anything - by paint I mean use pencils or watercolour or acrylic although the latter is not fluid enough for me even with the flow medium to make it so.  This little disk of wood is small, approx 1 inch round and I used Inktense blocks as watercolour paint.  I love strong vibrant colours.  I also LOVE outlines, just don't ever tell my art mentor from many years ago as he always steered me towards 'proper' art!  


Another wooden disk this time with acrylic, I find acrylic too gloopy for me and I struggle but I do love painting cats!  

Varnishing these things is a completely different subject!  You can't use a painted on varnish as it smudges the work - which is my favourite way of doing it - and on most I have used spray clear lacquer but I don't like it, the wooden pebble I experimented and sealed the surface first using a pencil fixative then when that was dry I used my acrylic matt varnish which you paint on, which worked brilliantly and I will be trying that again, hopefully it wasn't a one off!  

The others that took part in this theme are below....

Our Guest Artists:
CraftyHope: http://CraftyHope.com

Art Elements Team:
Jenny Davies-Reazor: https://jdaviesreazor.com
Cathy Spivey Mendola: http://cmendola.blogspot.com
Marsha Neal Minutella: http://blog.marshanealstudio.com


Sunday, 30 September 2018

Art Elements Fairy Challenge reveal.

September's Art Element challenge was set by Caroline of Blueberribeads and she choose 'Fairies' as the theme.

I grew up with The Flower Fairies and the delightful drawings of Cicely M Barker.  I also love the work of Brian Froud and Alan Lee.  There are so many artists out there who specialize in art works of fae, Jasmine Beckett-Griffith, Amy Brown, Linda Ravenscroft as well as less modern artists, Edmund Dulac and of course the Cottingley Fairies by Elsie Wight and her cousin Frances Griffiths, these of course caught the imagination of none other than Sir Arthur Conan Doyle who weaved a tale so believable that the public were divided as to whether or not fairies did exist.


Once the challenge was set I started to doodle and let my imagination loose, using stories from my childhood to guide me in my fairy quest.  Of all the fairies from the stories of my youth they were mainly in human form.  The Flower Fairies, Victoria Plum  and others.  But my muse doesn't really work with people.  My illustrative doodle above came about after a lovely walk with my dogs watching as Autumn takes over from Summer and the fruits of the hedgerows and orchards swell and colour the landscape.  I may have had a glass of something cold whilst doodling, even fairies like a tipple ..right? 


I researched a bit for animal fairies and was sadly disappointed in their lack.  They are there of course but writers of stories tend to humanize their fae.  I decided to change that!  I also discovered that the words 'fairy' and 'faerie' are a little different in interpretation.  

“Fairy” is a word that has been derived from Latin word “fatum,” which can mean “fate.” “Faerie” is a word that has been derived from Gaelic “fear shidhe,” which means “’man of the shee.”

Read more: Difference Between Fairy and Faerie | Difference Between http://www.differencebetween.net/language/words-language/difference-between-fairy-and-faerie/#ixzz5SOPa9eN4
So I doodled a little more and soon a scene emerged in my sketchbook. 


I decided to have an animal fairy, after all fairy are small 'folk' and in my world (art) animals are dominant.  After doodling some more in my sketchbook, my little scene developed and then to make it 'real'.


I have been exploring (read that as looking and drooling at lots of very talented artists on the web!) paper diaormas.  I really want to experiment much more than I have been doing.  I found in my cupboard a green 'thing' that was given to me by a member of the team (Niky Sayers).  She found it last Christmas and liked it so brought a few of them and gave them to the members of the team who met up in London back in January.  Suddenly I saw this green 'thing' as a mound in my world.  A few little glass toadstools, some paper grass, a wooden plinth and some trees - which in hindsight I would have done differently - with some of my own hand made gold watercolour paint and some 'found' acorns on a beautiful Autumn day walk with my dogs completed my vision... oh and a sprinkling of fairy dust (glitter), completed the look.


I got rather attached to my little mouse and decided to create her in glass too, then she got a name and now my sketchbook is full of little mice hoola hooping, running, playing and having wings! 

Thanks to Caroline for setting the challenge.  I nearly gave up as I really wasn't feeling the 'human' fairy but I am glad I stuck with the muse because I think Esme might go on to be a staple character in my stories and illustrations.

Others who have joined in on this month's themed challenge are below, I hope you enjoy reading their magical journeys this month. 


 Vic
Hope 
Cat 

Art Elements Team


Thursday, 30 August 2018

Art Elements Swirl Challenge Reveal.


This month the themed challenge over at the Art Elements blog was hosted by Marsha.  The theme was 'Swirl' and I almost didn't manage it!

All month I 'ummed and 'ahhed over what to do. I came up with nothing.  Nada.  Zilch.  I will admit that with less than a week to go I was seriously considering opting out and that made me a little miffed.  I felt I had let myself down.  

This month I have been busy, not just with the last few days of the wonderful heat wave - we are now back to traditional British Summer weather and as I look out of my window on this Bank Holiday Monday in August I see grey clouds and the dull greens of the trees and hedges.  It is a little depressing, even if Autumn (Fall) is coming and the leaves are slowly turning their glorious russet reds and golden browns, the glorious sunshine seems a thing of the past.    Other than lamenting about the weather, another traditional British past-time, I have been moving all my art 'stuff' into my newly decorated studio room and sorting out my new space.  The boy person isn't coming back now, his place has been taken by a fabulous antique oak desk I found on eBay and LOTS of books, paper, paints and pencils.  This is my room!  So I haven't had an awful lot of time in between organizing my studio room and being in my glass studio creating beads to think of challenges but this one was always at the back of my mind. 

I thought about getting out my yarn - now moved into my new room - and practising some free form crochet.  I used to love doing that last winter, but I wasn't inspired.  I thought about getting out my wire, again now in my new room and playing with twisting metals into shapes but that isn't something I have a passion for.  I thought about creating a 'normal' bead with swirls for decoration but was bored just thinking about that as my beads are not my beads unless they have a funny face and tail.

Then....

I was reading Jill's blog Kiln Fired Art  (she is taking part in this challenge too) and reading about her new frame and of course seeing her art work.  It was then I thought to myself, stop trying to create something that isn't you! 

 I have three passions in art, one is writing, one is glass and illustration.  I had discounted the glass for this challenge so it was either writing or illustration... off topic muse I wonder who would be interested in reading a challenge that I devoted to writing... ummm....

anyway...

I decided that I would take inspiration from Jill and do some small illustrations of swirls.  Just shapes and random ideas, then I looked up and out of my window and watched the wind bending the dull green trees and whipping up the dried and dead grass and leaves and wondered if Miss 'Mudge my only cat that was outside at the time, was still anchored on the ground!  The wind was rather fierce that afternoon.  I conjured up, in my imagination, Miss 'Mudge - this is her...


...hanging onto an umbrella, Mary Poppins style, and flying through the wind.  Then I thought an umbrella would be too heavy for her paws - it is no wonder my family worry about me and my weird imagination - so she would be better holding a balloon.  

Then...

I thought, VOILA!!!  my challenge piece will be an illustration of the wind, all swirly on the page.


And so, here it is!  I am not sure if it is finished yet.  I may yet add some more illustrative lines to the wind, maybe darken a few areas?.... I am not quite so sure but what I do know that is that when faced with a themed challenge work to your strengths!  

Hope you like my 'not quite' finished' piece and now I am looking forward to next months challenge, as long as I use the skills I have passion for!

Please come and hop the blogs and see what others have done with this challenging challenge, Swirl, was not an easy one, for me at least.  

Until next time....


Tuesday, 31 July 2018

Seed Pod, Art Elements Blog Hop Challenge

Welcome to the Seed Pod Challenge blog hop hosted this month by Jennifer of the Art Elements Team.  You can find the original link to the Seed Pod Challenge introduction blog HERE 


I started off experimenting with wet felting something I had never done before.  After watching various YouTube videos and digging out my limited stash of fibre materials and ordering a few more I made my felted piece that I wanted to turn into a 'sort of' sculptural piece.  

As I am sharing my blog post with the very talented Paulette who is joining the challenge (and you will not be disappointed her entry is just stunning!) .. I realized that between us we had A LOT of photos so not to bore all the visitors to the blog if you want to read about my wet felting process I did write it up the other week for Art Elements blog, only I didn't share the finished piece you only get to see that here.  CLICK HERE  for the blog post in which I describe how my first piece of wet felting went.. don't forget to come back ;)  

 Sorting out what I wanted to use - the brown fibres are 'natural' fibres and they are so soft! 


What will be the inside of my finished piece.


..and... the photos above and below is the outside of my finished piece. 


Getting wet and soapy....


Left to dry in the sun. 


The finished piece.  My imagination took over with my seed pod challenge and 'sort of  evolved'.  I had this idea in my head that magic folk (I am a repressed children's author so bare with me....) live in the woods and they build their homes in the natural materials around them.  Seed pods.

Just before I allowed my finished piece (photo above) to dry, I sat in the sun in the garden with soapy hands and sculpted and moulded the piece of felt into a shape I was happy with.  In my imagination (story) my magic people wove threads of twine with seed pods and branches to create hanging 'pods' in which to live.  I added some beautiful natural curls of wool (I name the sheep this wool comes from in the Art Elements post), to 'decorate' the opening of the 'door' to the home.  


Now, if you have read the Art Elements blog piece  in which I show and explain my working of the fibres you will know that my husband (a very un-arty man!) likened my 'pod' to a dead squirrel.

I added lots of seed beads and sequins in shiny silver to give the illusion of rain drops and the dangle at the bottom has a blue shell bead.  Blue is the colour associated with the sea and the sky and also for wisdom and loyalty.  These are very important to my  magic people who live in the woods.

 The Green Man is a beautiful ceramic cab from Jenny in the team and with my limited seed beading skills I beaded around him and added some bead leaves... every magic person has to decorate their pod house... right?  

My husband still said it looked like a dead squirrel but I enjoyed the process and creating the story in my head (this is the abbreviated version for the blog!) whilst I wondered around the ancient woods with my dogs.  Yes we really have ancient woods near us, we are very lucky.  

I also did another seed pod piece, which sort of evolved from a video I posted in a sketch group I belong to on FB.  You might have seen the video it has gone viral.  It is of an artist filling a plastic up with various acrylic coloured paint and pouring it onto a canvas.  I wanted to have a go but using my acrylic inks.


It is messy!!  but fun.  I did find I had to put 'glazing medium'  on the surface of the canvas to allow the inks to move freely.  I also didn't use a cup I just splodged it on and moved the canvas to allow the colours to blend.


I had no real plan in mind when I started.  I just wanted to make a mess and have fun!!  


When it dried - much lighter although the camera has washed out the colours a bit in the photo below - I left it on the side in the dinning room and 'umm'ed and ahhh'ed' over it for a few days, then I grabbed my Posca pens (I only have black and white) and added my favourite dried 'flower' heads that I see in the ancient woods.  These plants start off as a cluster of white flowers in spring and when the flowers die off they are just as beautiful in their skeleton form.  Each flower leaves behind a seed head.  It is a bit abstract and not the 'norm' for me but I enjoyed the experiment.  Not sure I would do it again though, it was super messy.  


Thank you for reading my ramble and please enjoy Paulette's wonderful design with her very dangerous looking seed pods.  Paulette did send me all the photos and words all done and ready to load but unfortunately they were too small to upload directly so I copied each piece out and hopefully have married it up correctly with it's right photo. 


Introducing Paulette Scott who is taking part in the Seed Pod Challenge too.  


Well to start off I go out on a nature walk looking for Devil Claw seed pods (Proboscidea  Athaeifolia)  walk all along the Arroyo - dried up stream bed in the South of Texas, none to be found down here, I suppose we don't get enough rain in the Spring for them to grow, so I got on Etsy and ordered some.  They came in on the 11th and they are much nastier than I remembered. 


Those little curved points are very sharp and hurt!  I have cleaned them and dipped them in polyurethane to seal them.


I sat there trying to decide what to do with the pods.  I decided to create Dream Catchers with them, but I want them prettier than the regular 'Tourist Trap' ones (perfect circle metal hoops, artificial sinew and fake eagle feathers).  I asked myself 'what is the prettiest inspiration I have around the house??'  

Our little girl Ruby, a Rose Breasted Cockatoo.


 Inspiration found, now to get all the rest of the supplies, a trip to the bead store for beads and the very thin rat tail cording.  For the feathers, I am using all of Ruby's own feathers, she moults once, sometimes twice a year and I collect them.  A quick trip out to Hobby Lobby for some cord crimps.  
Now I have everything so time to start.  


 After poking myself a dozen times I put on a small drop  of E6000 glue on those nasty little hooks and once again start the webbing.


 Next up was to embellish the individual hoops.  Beads and feathers next.   

After much sewing and fixing feathers I think I have them.  I hope you like them as much as I liked making them.  


I tie on the rat tail cording and start the webbing. 


 I need to stop now, or they will never be finished.  Here there are hanging up.


Thank you for reading and hope you can hop over to the others that took part in this challenge.

Guest Artists:
Art Elements Team: